Edges and surfaces
Hand-sand a small unfinished panel
Track scratches on a practice panel and decide when it is ready for a finish sample.
Materials and practice dimensions
- A bare, unfinished solid-wood offcut about 200 × 100 × 12 mm; avoid unknown coatings
- Flat sanding block about 70 × 40 mm; abrasive grades appropriate to the intended finish
- Low-angle lamp, dust collection suitable for wood dust, pencil and worksheet
Use sound, dry wood with shallow surface marks. This exercise is for a small solid-wood sample; a thin plywood face needs its own gentler trial. Read the finish label before choosing the final grit. Minwax gives 100 or 120 grit for an initial sanding and 220 for a fine second stage in its general guide. That example is not a universal finish schedule.
Work through the procedure
1. Map the starting surface
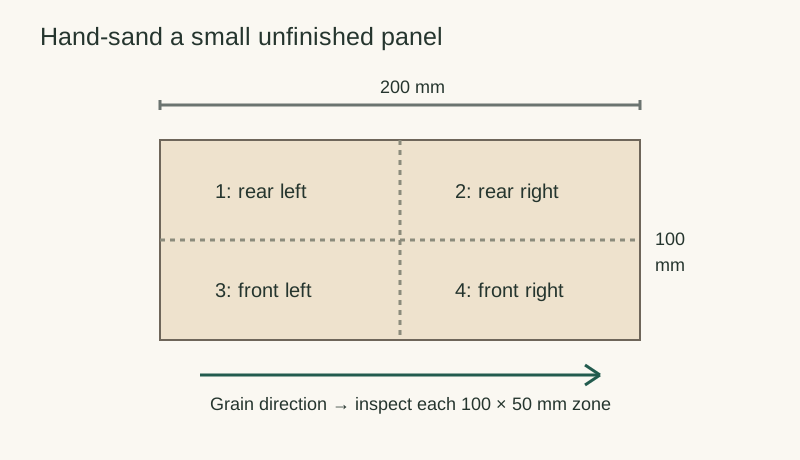
Mark an arrow for the grain direction on the underside. Divide the worksheet into four zones matching the panel face. Under a low-angle light, record scratches, torn fibres and dents in each zone. Keep a photograph if it helps compare the same surface later.
2. Support the abrasive
Wrap the first abrasive around the flat block so it lies smooth. Support the work on a stable bench and arrange dust capture and the protection required for wood dust. Keep the block flat on the face and use light, overlapping strokes along the grain.
3. Inspect before changing grit
Pause frequently, clear the dust and use the same light direction. Check that the original shallow marks are removed and that the sanding pattern is consistent. Do not keep sanding one deep dent until the surrounding face becomes hollow.
4. Refine the surface
Move to the next grade in the chosen finish schedule. Cover the same zones consistently until the earlier scratches are replaced by the finer pattern. Keep the block supported at the ends instead of tipping it over the corners.
5. Clean and test the finish
Remove dust using suitable collection; Minwax suggests a brush attachment on a vacuum or a damp cloth. If moisture is used, allow the wood to become ready for the chosen finish. Apply a finish sample on this offcut under that product’s directions before preparing the actual project.
Worked example
On the 200 × 100 mm sample, four 100 × 50 mm worksheet zones make inspection repeatable. Suppose the left-front zone has one deep dent while the other three are clean. Record the dent separately and decide whether it is acceptable or needs repair; extra sanding across the entire face wastes material without guaranteeing the dent will disappear.
Check the result
- No coarse scratches remain visible under the same raking light.
- The face stays flat enough for its intended joinery and the corners retain their intended shape.
- The finish sample is acceptable after the product’s drying period, with the preparation sequence recorded.
If it does not work
If new scratches appear, inspect the abrasive and block for trapped debris before sanding further. If a dent is deeper than the removable surface allowance, repair or replace the part. Stop at a veneer breakthrough; more sanding cannot restore the missing face.
Keep a workshop record
Use the downloadable worksheet or print this page and write beside each prompt.
Wood and starting condition: ____________________
Finish product / required final grit: ____________________
Abrasive sequence used: ____________________
Zone 1 / 2 / 3 / 4 findings: ____________________
Dust removal and drying: ____________________
Finish-sample result: ____________________
Continue your work
Sources and method
The practice dimensions, examples and diagrams are original. Manufacturer guidance is scoped to the named products. Review the current product instructions before using them. Sources checked October 20, 2026.
- Minwax: Sanding tips — Choosing the right sandpaper; Capturing dust; Choosing the right sander.