Edges and surfaces
Apply iron-on banding to one plywood edge
Practise preparation, bonding and cool trimming on a short exposed edge.
Materials and practice dimensions
- One clean plywood offcut about 250 × 80 mm, with measured thickness 18 mm
- Compatible pre-glued veneer wider than the actual panel thickness; example width 22 mm
- Iron and heat-safe rest, protective paper specified by the product, pressure block or roller, compatible edge trimmer and sanding block
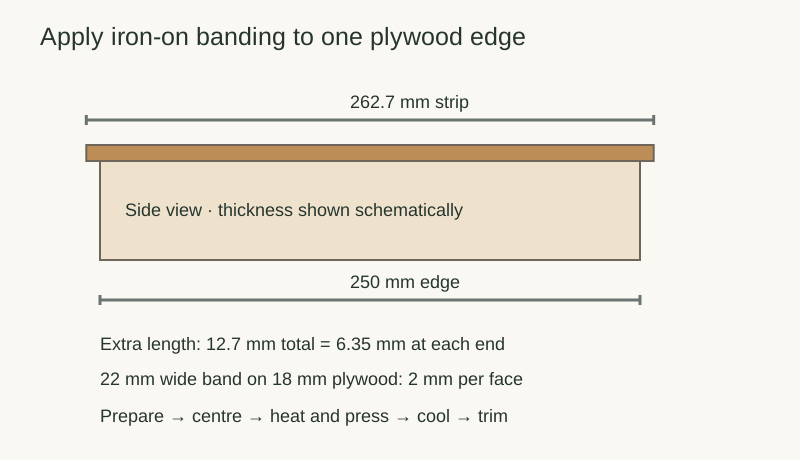
Use the directions for your exact roll. The worked dimensions assume a 250 mm edge and 22 mm banding on 18 mm plywood. BAND-IT specifies an extra 1/2 inch of length: that makes this trial strip 262.7 mm, leaving about 6.35 mm at each end. Another product may require a different allowance or iron setting.
Work through the procedure
1. Prepare a continuous edge
Support the panel firmly with the edge accessible. Remove loose material and dust; smooth rough areas without rounding the face corners. Repair voids only with a substrate repair suitable for the banding adhesive, and let it become ready under its own directions.
2. Centre the strip
Place the banding dry on the edge. In this example, the width surplus is 4 mm, or 2 mm on each face. Confirm there is enough overhang along the whole edge before heating. Mark the ends lightly on the waste.
3. Activate and press
Follow the roll instructions for iron setting and protection. BAND-IT specifies the cotton setting and protective kraft paper or foil. Move the iron over the strip to activate the adhesive, then press with the block or roller while the adhesive is workable. Keep hands away from the iron and hot glue.
4. Cool before trimming
Let the strip cool fully and check that it is attached before using a trimmer. Support the panel and keep hands out of the cutting path. Follow your trimmer instructions; Edgemate calls for steady pressure along a cooled, firmly bonded edge. Trim the end surplus using a method approved for the banding and tool.
5. Inspect the result
Look along both face corners for lifted areas, gaps and torn veneer. Lightly smooth sharp remnants with the sanding block without thinning the plywood face veneer. Record whether the strip still covers the edge from end to end.
Worked example
The useful dimensions are independent: strip length 262.7 mm, panel edge 250 mm, strip width 22 mm, panel thickness 18 mm. Length allowance cannot compensate for banding that is narrower than the board. Measure the finished outside dimension if the part must fit inside a tight opening; the added veneer changes that dimension.
Check the result
- The entire substrate edge is covered after trimming.
- The cooled bond has no visibly lifted section or gap.
- The plywood face veneer is intact and the finished dimension still fits the intended space.
If it does not work
For BAND-IT, the maker permits reheating and repositioning. Check the exact product before doing so. If veneer scorches, splits or loses coverage, stop and replace the practice strip rather than hiding the damage with finish. Persistent lifting needs a substrate, adhesive or heat-process check.
Keep a workshop record
Use the downloadable worksheet or print this page and write beside each prompt.
Banding brand / product and current instructions: ____________________
Panel thickness / strip width: ____________________
Edge length / allowance / strip length: ____________________
Bond after cooling: ____________________
Trim result / final outside dimension: ____________________
Rework needed: ____________________
Continue your work
Sources and method
The practice dimensions, examples and diagrams are original. Manufacturer guidance is scoped to the named products. Review the current product instructions before using them. Sources checked October 20, 2026.
- BAND-IT: Edgebanding application instructions — Page 1, English steps 1–4.
- Edgemate: Frequently asked questions — How do I apply pre-glued Edgemate edgebanding?.
- Edgemate: Hand Trimmer directions — Page 1, trimming steps 1–4.